 Reviews

 Proudly American

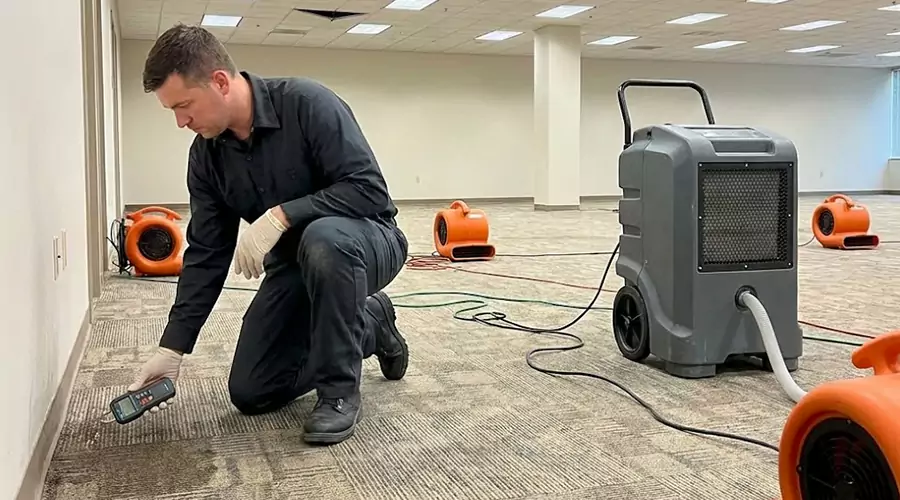
After a leak, the visible water is often only part of the problem. A floor may look dry, a wall may feel normal, and a ceiling stain may stop spreading, but moisture can still be trapped inside building materials. Hidden moisture can stay behind drywall, under flooring, inside cabinets, beneath carpet padding, and around wood framing.
This is why professional moisture inspection is so important after water damage. Restoration companies use tools, experience, and a step-by-step inspection process to find moisture that homeowners may not see. Finding hidden moisture early can help prevent mold, musty odors, warped floors, soft drywall, and expensive repairs.
Understanding how professionals find hidden moisture after a leak can help homeowners know what to expect during a water damage inspection.
Why Hidden Moisture Is a Serious Problem
Water does not always stay where the leak happened. It can travel through small gaps, cracks, seams, and porous materials. A leak under a sink can move into the cabinet base, wall behind the cabinet, and floor underneath. A roof leak can soak attic insulation before showing as a ceiling stain. A toilet overflow can move under tile and behind baseboards.
Hidden moisture is serious because it can continue damaging materials long after the surface looks dry. If moisture remains trapped, it may lead to mold growth, wood swelling, odors, stains, and structural problems.
Common Places Moisture Hides After a Leak
Professionals know where water usually travels after a leak. They check areas beyond the visible damage because moisture can spread sideways, downward, or into connected materials.
Common hidden moisture areas include:
- Behind drywall
- Under laminate, hardwood, or vinyl flooring
- Beneath carpet padding
- Inside kitchen and bathroom cabinets
- Behind baseboards and trim
- Above ceiling stains
- Inside insulation
- Around door frames and window frames
- Under appliances
- In crawl spaces or basements
A small visible spot may have a larger hidden moisture area behind it.
Step 1: Asking About the Leak Source
The inspection usually starts with questions. A restoration professional may ask when the leak started, how long the water ran, where the water came from, and what areas were affected.
They may ask:
- Was the water from a clean supply line?
- Did the leak come from a drain, toilet, roof, or appliance?
- How long was the area wet?
- Was there standing water?
- Did water reach another room?
- Has there been a musty smell?
- Were any materials already removed?
These answers help the team understand the possible water path and decide where to inspect first.
Step 2: Visual Inspection
A visual inspection helps professionals find signs of moisture damage. They look at walls, ceilings, floors, trim, cabinets, and nearby rooms. They also check areas below or beside the leak because water often travels farther than expected.
Visible signs may include:
- Water stains
- Peeling paint
- Bubbling drywall
- Swollen baseboards
- Warped floors
- Damp carpet
- Musty odors
- Soft drywall
- Cabinet discoloration
- Mold spots
A visual inspection is helpful, but it is not enough by itself. Many moisture problems are hidden inside materials.
Step 3: Using Moisture Meters
Moisture meters are one of the most important tools used during water damage inspections. These tools help measure moisture inside or on the surface of building materials.
Professionals may use pin type meters or pinless meters. A pin type meter uses small probes to test moisture inside a material. A pinless meter scans the surface without making holes. The right meter depends on the material and the situation.
Moisture meters can be used on:
- Drywall
- Wood flooring
- Baseboards
- Cabinets
- Subfloors
- Trim
- Ceiling materials
These readings help confirm whether a material is dry, damp, or still holding too much moisture.
Step 4: Using Thermal Imaging Cameras
Thermal imaging cameras help detect temperature differences on surfaces. Wet areas often appear cooler than dry areas because moisture changes how heat moves through the material.
A thermal camera does not directly prove moisture is present, but it helps professionals find areas that need closer testing. If a cool area appears behind a wall or ceiling, the restoration team may use a moisture meter to confirm whether water is present.
Thermal imaging is useful for checking large areas quickly, especially after roof leaks, plumbing leaks, storm damage, and water traveling behind walls.
Step 5: Moisture Mapping
Moisture mapping is the process of marking and tracking where moisture is found. This helps the restoration team understand how far the water traveled and what materials are affected.
A moisture map may show wet areas, damp areas, dry areas, and locations where drying equipment is needed. It also helps track progress during the drying process.
Moisture mapping is useful because water damage can change over time. Professionals may take readings on the first day and compare them with later readings to confirm that materials are drying properly.
Step 6: Checking Flooring and Subflooring
Flooring can hide moisture very easily. Water may seep between planks, under tile, beneath vinyl, into carpet padding, or down to the subfloor.
Professionals check flooring for signs such as buckling, cupping, lifting, soft spots, or damp smells. They may also test moisture levels in wood flooring, subflooring, and nearby baseboards.
This step is important because flooring may look dry on top while moisture remains underneath.
Step 7: Inspecting Wall Cavities and Baseboards
Baseboards and wall cavities are common moisture hiding places. Water often travels down walls and collects near the floor. Swollen trim, peeling paint, or soft drywall may indicate that moisture is trapped inside the wall.
In some cases, professionals may remove small sections of baseboard or make controlled openings if needed. This helps air reach wet materials and allows the team to inspect hidden areas more clearly.
Step 8: Monitoring Drying Progress
Finding hidden moisture is not the final step. Professionals continue checking moisture levels while drying equipment runs. Air movers, dehumidifiers, and other equipment may stay in place until moisture readings show the materials have reached safe levels.
Monitoring helps prevent equipment from being removed too early. It also helps confirm that the property is drying properly instead of only looking dry on the surface.
Why Homeowners Should Not Guess
Homeowners often rely on touch, smell, or appearance to decide whether an area is dry. These clues can help, but they are not reliable enough after serious water damage.
A wall can feel dry while the inside is damp. Carpet can feel dry while the padding is wet. A cabinet can look normal while moisture is trapped underneath. Guessing can allow hidden moisture to remain and cause secondary damage.
When to Call for a Moisture Inspection
You should call a restoration company if water reaches walls, floors, ceilings, cabinets, carpet, insulation, or more than one room. You should also call if you notice musty odors, stains, soft drywall, warped flooring, or mold spots after a leak.
Professional inspection is especially important after roof leaks, appliance leaks, burst pipes, toilet overflows, basement flooding, or long term plumbing leaks.
Final Thoughts
Professionals find hidden moisture after a leak by combining visual inspection, moisture meters, thermal imaging, moisture mapping, flooring checks, wall cavity inspections, and drying progress monitoring. These tools help locate moisture that homeowners cannot see.
Hidden moisture can lead to mold, odors, warped flooring, soft drywall, and costly repairs if it is ignored. If your home has had a leak, do not rely on surface drying alone. A professional moisture inspection can confirm what is wet, guide proper drying, and help protect your property from long term damage.